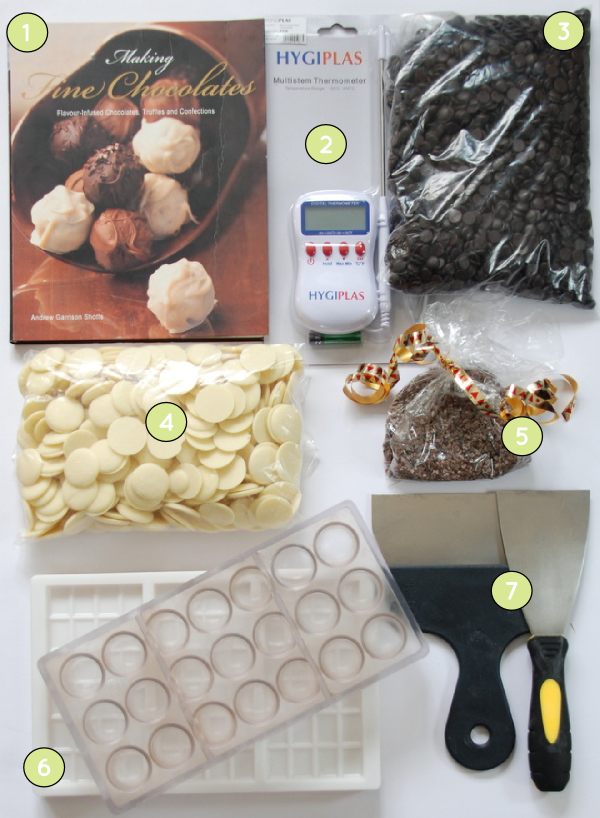
I gave two of these starter kits as gifts for Christmas and thought it might be helpful for others who are interested in learning how to temper chocolate and make chocolates at home. My brother and his wife had been interested in making their own truffles for a while. I thought I would not be able to give them something like this without having to provide them with a piece of marble as that was how I used to temper chocolate. However, recently I have been using the seeding method with great success and slightly less mess, which opened up the possibility of putting together this kit as a gift. My brother has since successfully produced some beautiful moulded truffles.
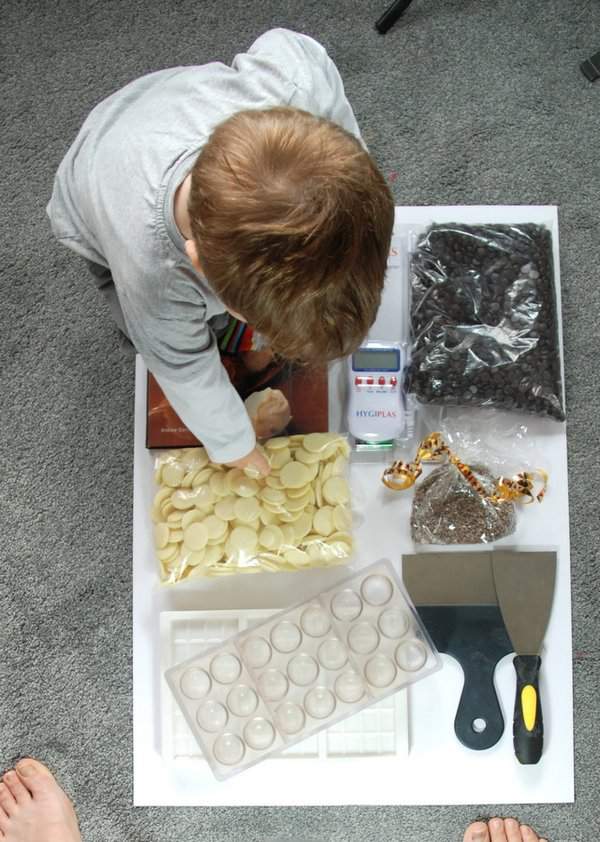
The first picture goes through the basics and then the second includes a few helpful extras.
1. Making Fine Chocolates by Andrew Garrison Shotts
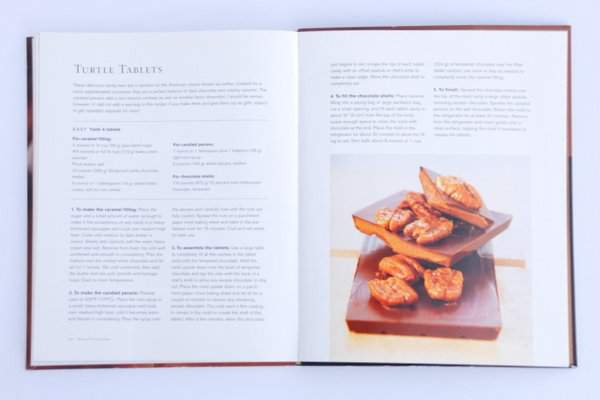
This is a really good introductory book which covers a lot of the basics including tempering using the seeding method and pairing of flavours. It has a wide range of interesting recipes and all of the recipes I’ve tried have been delicious – especially the Turtle Tablets…
Finally, it is very reasonable price.
Cost: £9.74
2. Thermometer
I have tried several different thermometers and despite being the cheapest this Hygiplas thermometer from Nisbets is the one I find most reliable.
Cost: £9.99
3, 4 and 5: Dark chocolate couverture, white chocolate couverture and cocoa nibs
I included 1kg of both white chocolate couverture and dark chocolate couverture as well as a small packet of cocoa nibs. Couverture is a high quality chocolate that contains additional cocoa butter. It is much easier to temper in larger quantites so it’s worth ordering a large amount of this. Shokinag (also listed under deZaan) is a good quality Belgian chocolate couverture that has a good price (around £4.50 a kilogram though you need to buy 10kg boxes). It’s also relatively easy to work with but as you get more experienced you may want to try out finer chocolates such as Valrhona and Amedei. You can also buy Callebaut in smaller quanties but personally I have not really enjoyed any of the ones I have tried.
I would definitely include dark chocolate for complete beginners, even if they prefer milk chocolate, as it is much easier to learn tempering with dark chocolate then progress onto milk and white. I included the white as it can be used in a lot of different truffle fillings.
I have bought chocolate from both Keylink and HB Ingredients in the past and both have excellent service. There is a relatively large delivery charge for small orders though and many items are only available to buy in fairly large quanities. If you only want smaller quantites then a better option may be the ‘Chocolate Trading Co’ or Squires. The price per kilo will be much higher but you can buy a lot less and will have a smaller delivery fee.
The cocoa nibs are not essential but make an interesting addition for those who love dark chocolate and can be used in baking as well as making chocolates. I love them caramelised in yoghurt or granola.
Cost: Around £10
6. Moulds for truffles
I have bought most of my moulds second hand for £10 or less, either from the teacher I first learned from or from HB Ingredients. Definitely get the professional polycarbonate moulds as they will be a lot more durable and easier to use. I bought new ones from Squires when I made up these kits. The photo shows two moulds – one for 100g bars and one for moulded dome truffles. As it is easier to temper larger amounts of chocolate it is worth having at least two moulds. Of course, if you just want to practice tempering first you could wait and buy these later.
Cost: £15.20 per mould
7. Scraper
I started out with a basic wallpaper scraper from B&Q (shown on the right). Obviously it had never been used for wallpaper and I washed it thoroughly but it was too narrow. I recently upgraded to this one from Keylink, which is as wide as the moulds and therefore makes the job a lot easier plus it doesn’t actually cost that much more. Squires have one as well for £16.85.
Cost: £8.21
In total the kit above would cost around £53 if you bought one new mould. Some other really useful items to have are….
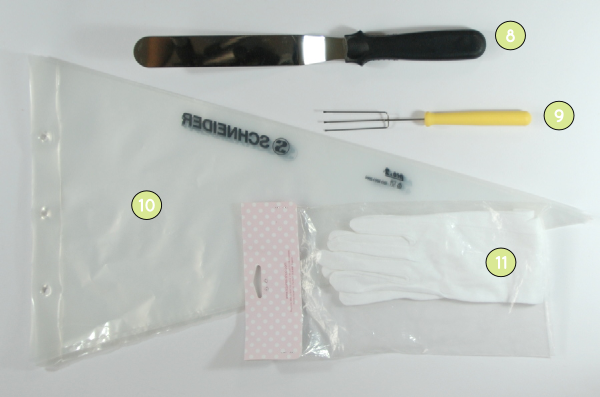
8. Offset palette knife
It doesn’t have to be offset so if you already have one don’t worry about getting another. It has many uses including spreading out the chocolate when closing moulded truffles and also for tapping an upside down mould to remove excess chocolate. Nisbets have this one.
Cost: £10.99
9. Dipping fork
This is another thing that isn’t completely necessary and I’ve only picked up recently but it does help give a better finish when making. I chose a three pronged one from Keylink.
Cost: £7.43
10. Piping bags
The ones in the picture are really large and come in a pack of 100 from Keylink. I use them a lot for making chocolates and macarons so like to keep a good supply but you could buy some from Amazon or Nisbets even cut a small hole in a sandwich bag as an alternative. I added a few to each present.
Cost: From £9.99 for 100
11. Gloves
Although these are not 100% essential some lint free white cotton gloves will prevent you from damanging or marking your chocolates when you handle them. It will take a long time to make them so it’s definitely worth having some. I can’t find exactly where I bought them but you can get some from ‘Cakes, Cookies and Crafts‘.
Cost: £2.54
There are plenty of other things that you might want to try, such as chocolate transfer sheets or dust colours but I have tried to stick to the basics here. I also added a jar of homemade salted caramel in the kit so the recipients would not have to worry about making a filling the first time they made truffles. There is some other equipment that you need like a large heatproof mixing bowl and a wooden spoon but I’ve assumed most people would already have these. I packaged all of the items up together and they fit in a surprisingly small box.

Once you have all or even some of the equipment then you’ll be able to make some lovely professional looking chocolates in whatever flavour you desire, either for yourself or as presents (or for your son’s pre-school fair if you’re slightly mad). For those of you that give it a try then good luck and do let me know how you get on or have any further questions.
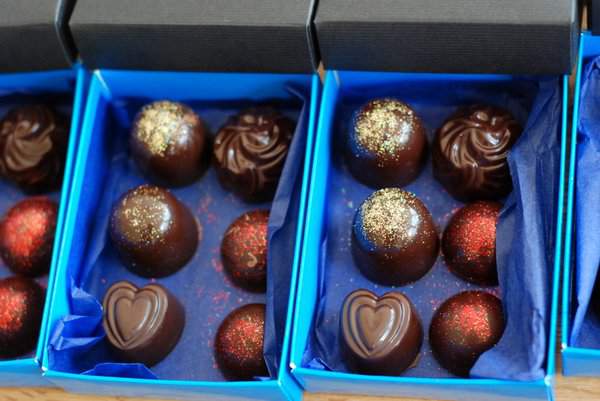
Below is a picture of my helper choosing which chocolate he would like. He doesn’t know it yet but his favourite is dark chocolate really.
4 Comments
Best foodie christmas gift ever! and those chocolates look so yummy and so much fun to make.
Thanks, I really enjoyed putting it together.
What a wonderful idea…I would LOVE to receive one of these! Your chocolates look divine 🙂
Thanks – maybe you should send a link to this to ‘carniverous boyfriend’ before your next birthday 🙂